Shopping Cart
Your cart is empty.
Subtotal: $0
Alterations: $0
Total: $0
The tie, a staple in the sophisticated man's wardrobe, is more than just a piece of fabric. It's an expression, a statement, and sometimes, even a conversation starter. While the fabric, design, and color of your tie speak volumes about your style, how you knot it can be equally revealing. From the effortlessly classic men's suit ensemble paired with a simple Four-in-Hand knot to the modern maverick sporting the intricate Eldredge, the way you tie your tie tells a story.
Whether you're a seasoned tie-wearer or just beginning your sartorial journey, understanding the diverse ways to knot your tie can elevate your style. With myriad methods available, each with its unique flair and level of complexity, there's a knot for every occasion, mood, and personality. Let's dive deep into the world of tie knots, exploring both the classics and the novelties, and learn how to perfect each one with Suitcentury's guide.
Often considered the oldest and most classic way to tie a tie, the Four-in-Hand Knot is universally versatile. Its asymmetrical shape makes it a go-to for business meetings, casual events, and almost any occasion in between. Paired with a crisp dress shirt and a finely tailored men's suit, this knot exudes understated elegance. Its name, believed to have origins from 19th-century carriage drivers, hints at its longstanding history. Whether you're a novice or a seasoned suit-wearer, the Four-in-Hand is an essential knot to master.
The Four-in-Hand Knot, with its slight slant and modest size, complements almost every shirt collar and tie design. It's the embodiment of timeless charm and is a must-know for every gentleman.
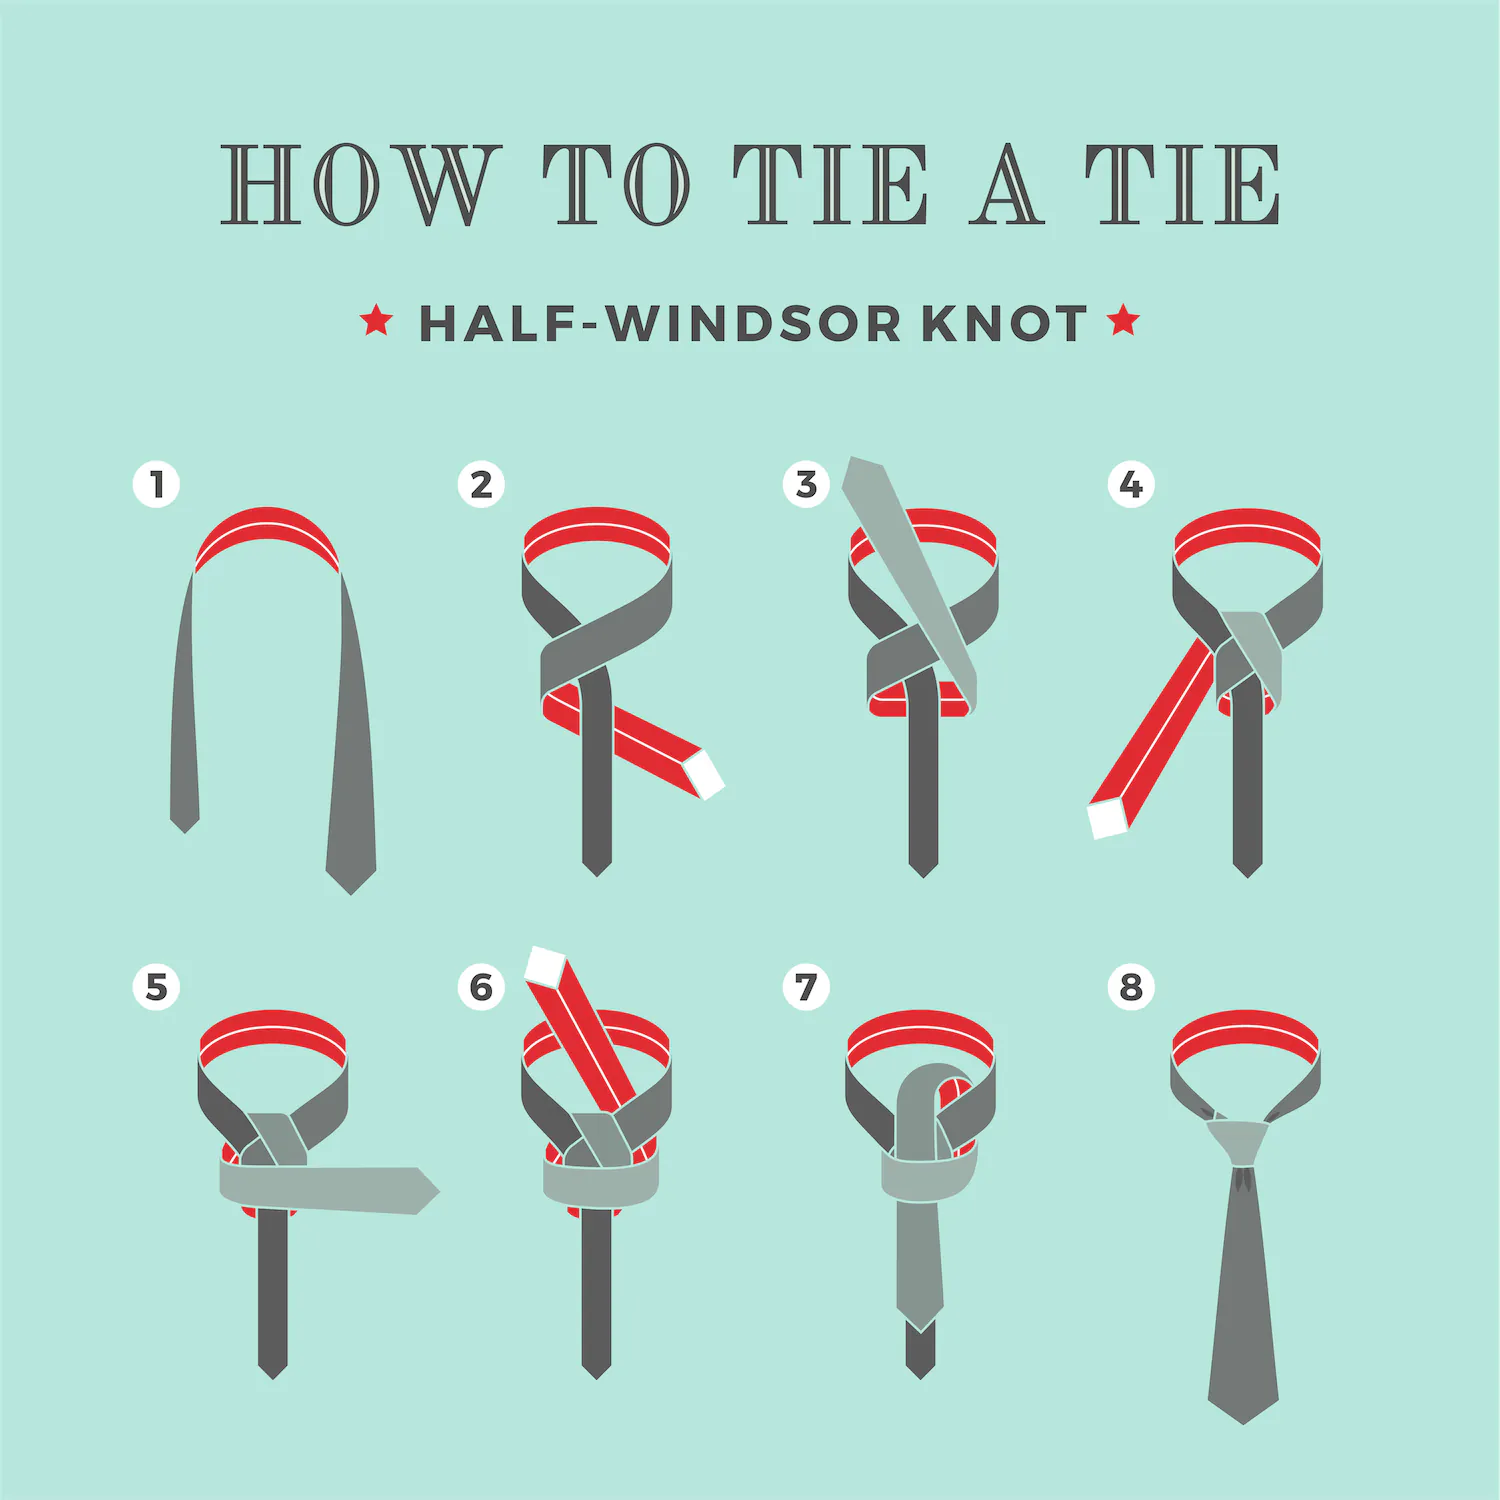
Striking the perfect balance between the simplicity of the Four-in-Hand and the grandeur of the Full Windsor, the Half-Windsor Knot is the epitome of versatile sophistication. Its symmetrical triangle shape exudes a more polished look, making it an excellent choice for both professional settings and special occasions. When matched with a stylish men's suit online, the Half-Windsor speaks of a meticulous attention to detail. It's especially suitable for spread collar shirts, giving ample space for the knot to shine.
The Half-Windsor Knot, with its medium size and symmetrical shape, is a statement of style and confidence. A classic choice for modern professionals, this knot ensures you stand out in the best way possible.
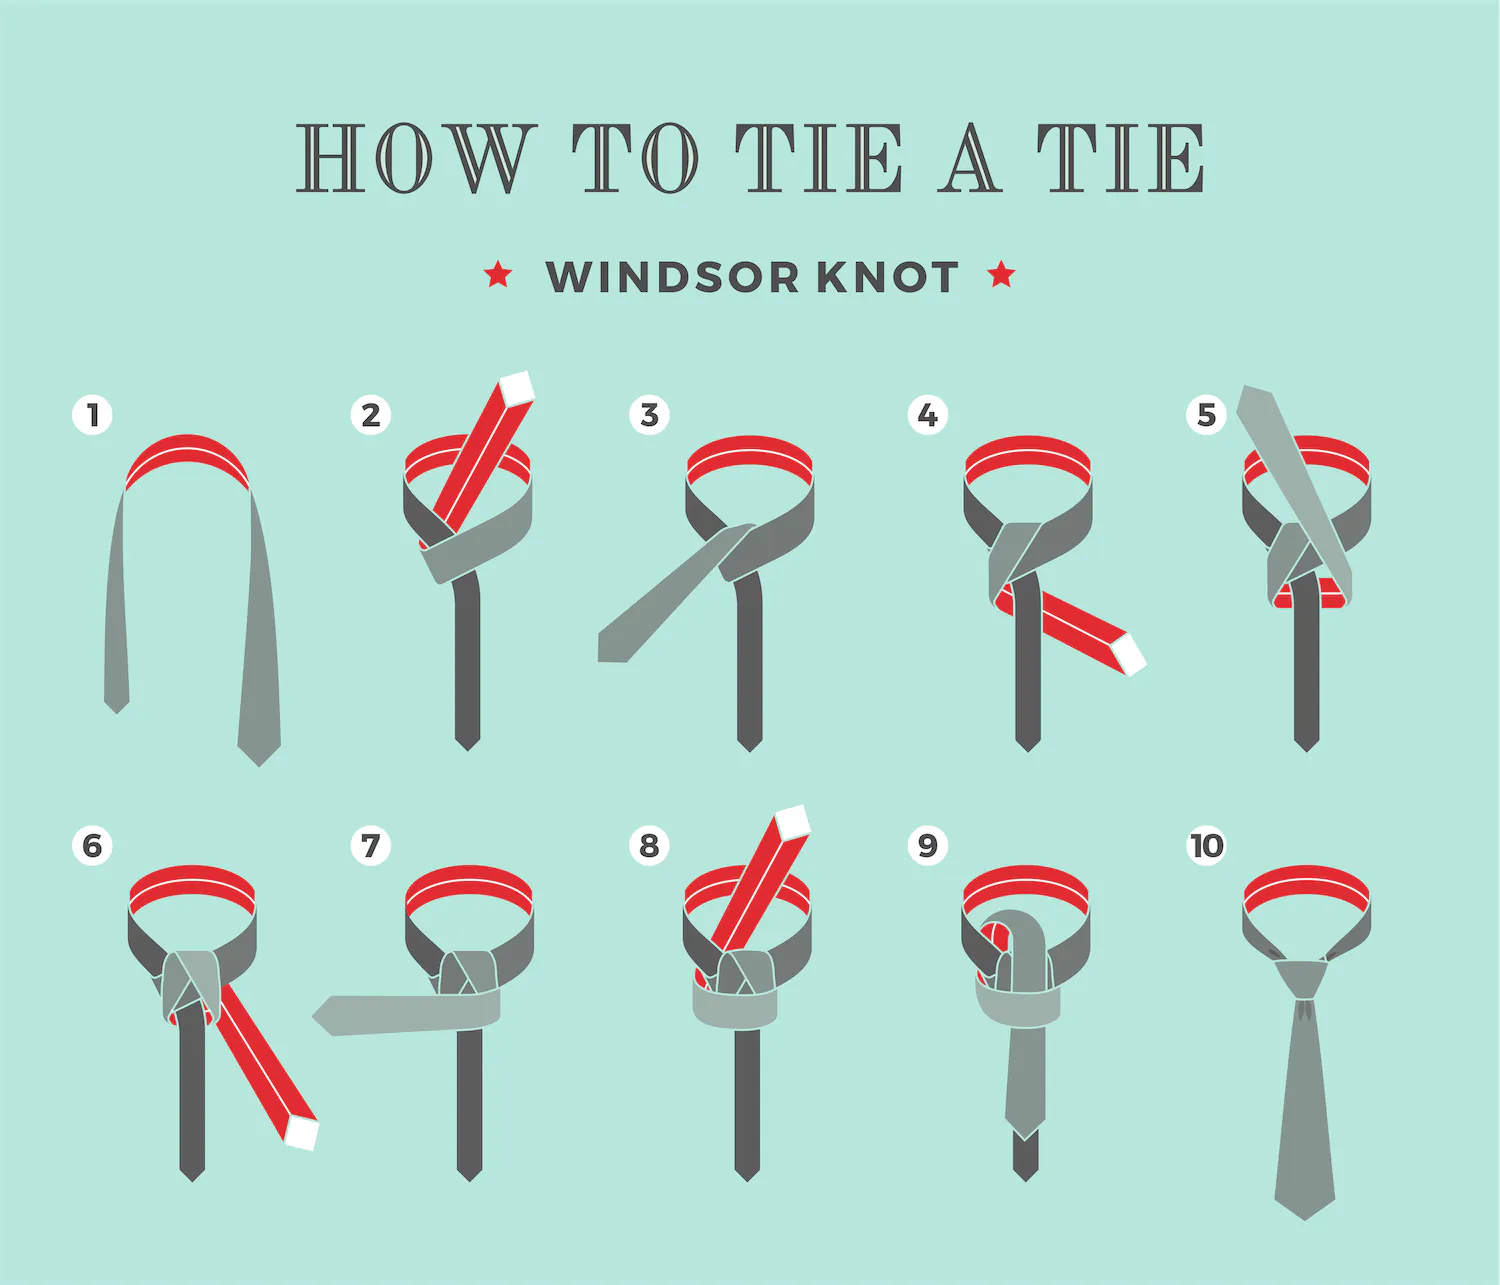
If there's a knot that embodies sheer grandeur and formality, it's the Windsor Knot. Known for its wide, symmetrical shape, the Windsor Knot is often associated with powerful figures and formal occasions. Named after the Duke of Windsor, this knot is a symbol of royalty and elegance. When paired with a sharp men's suit online, it accentuates the wearer's stature and confidence. Given its sizable shape, the Windsor is best suited for wide-spread collars, ensuring the knot gets the attention it deserves.
Creating the perfect Windsor Knot may require a bit of practice, but once mastered, it's an unbeatable choice for occasions demanding a touch of sophistication. Standing tall and proud, the Windsor Knot is an ode to timeless sartorial excellence.
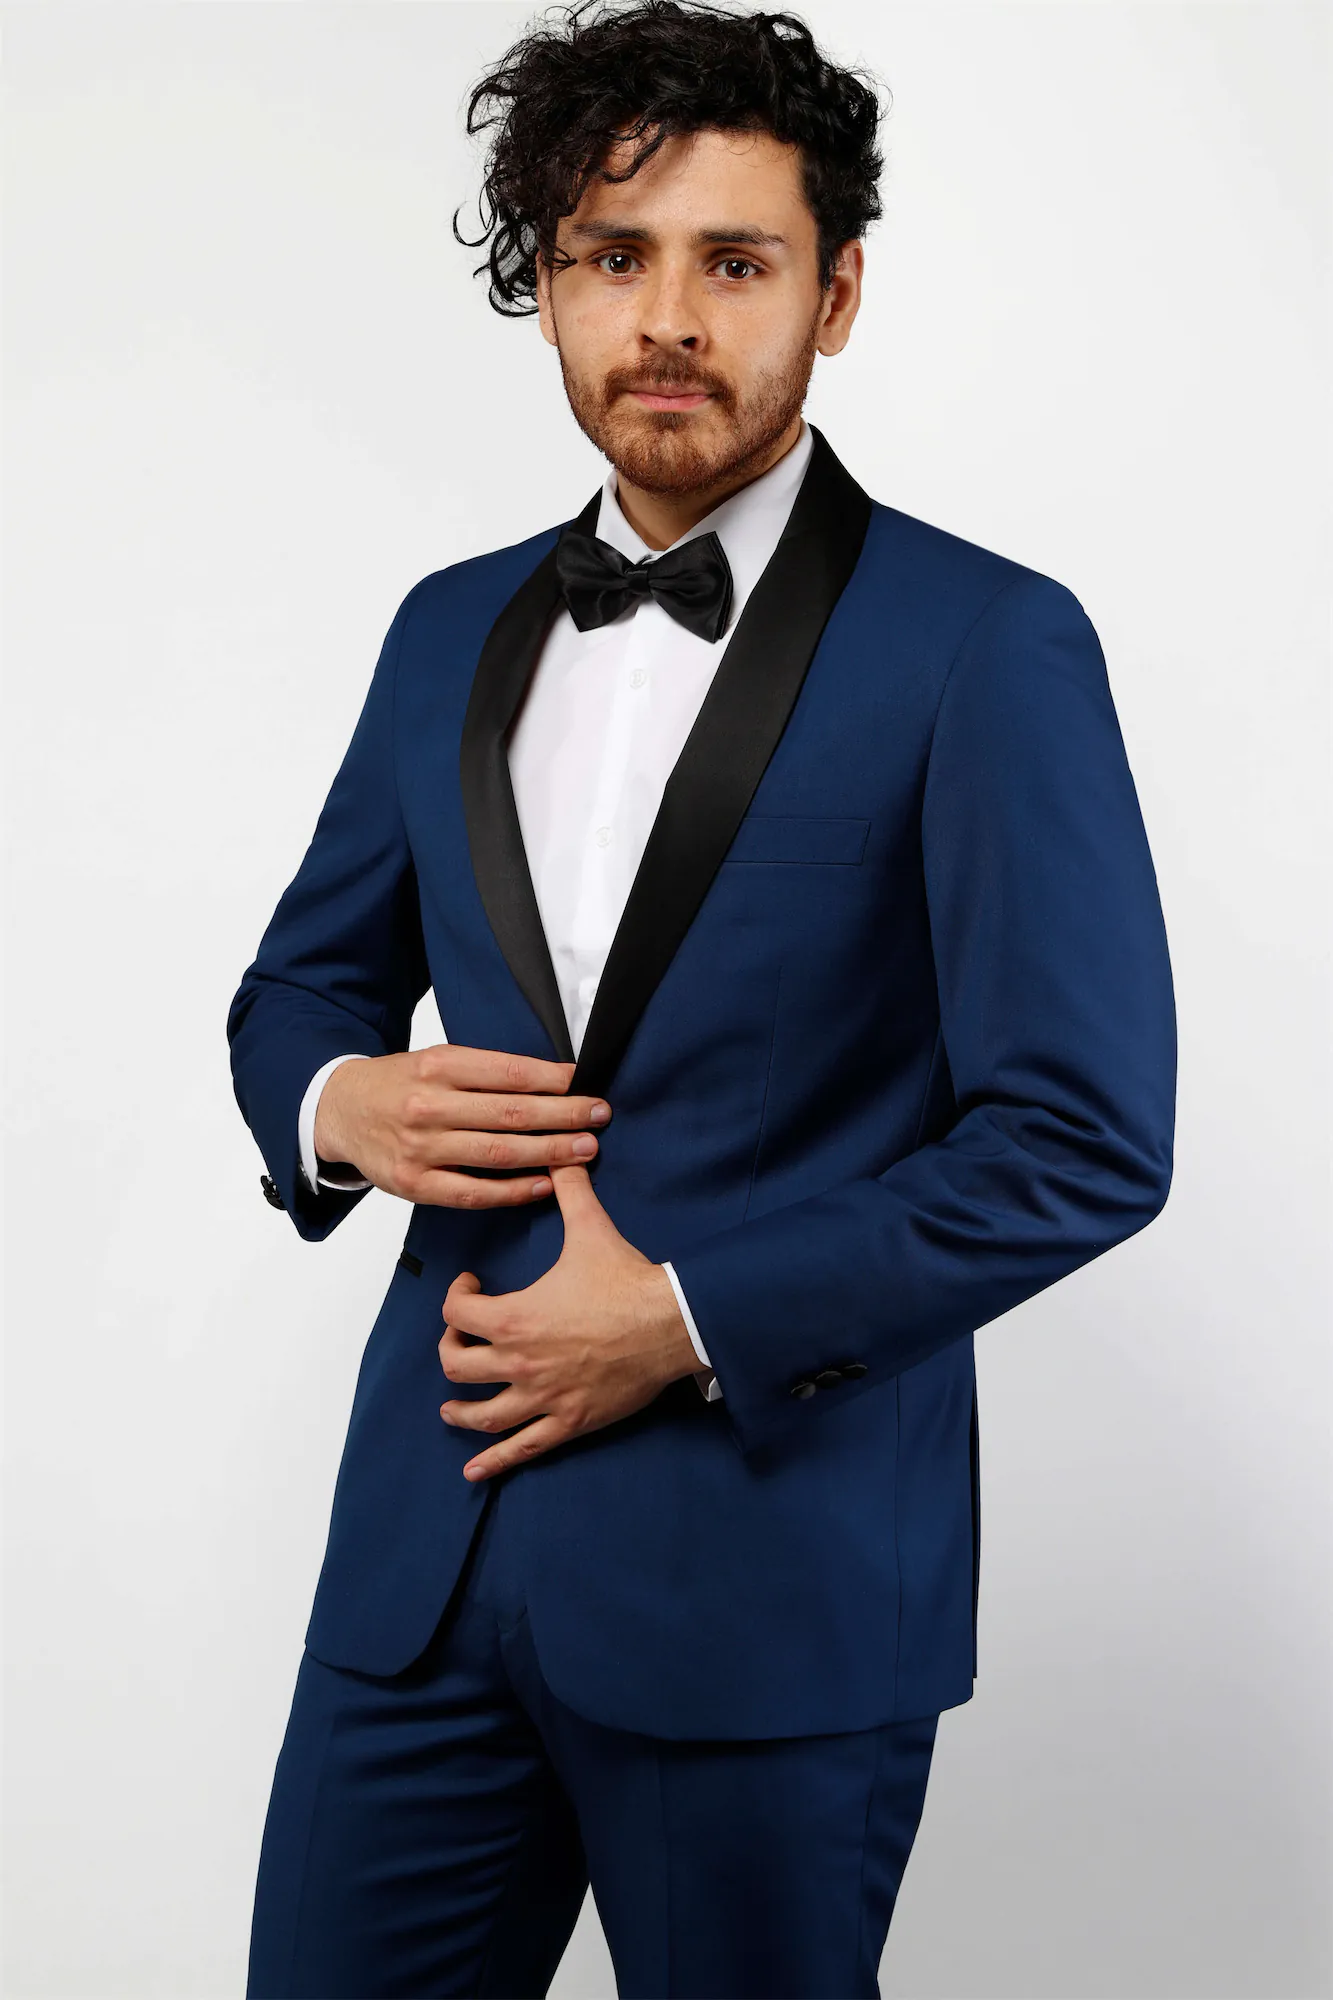
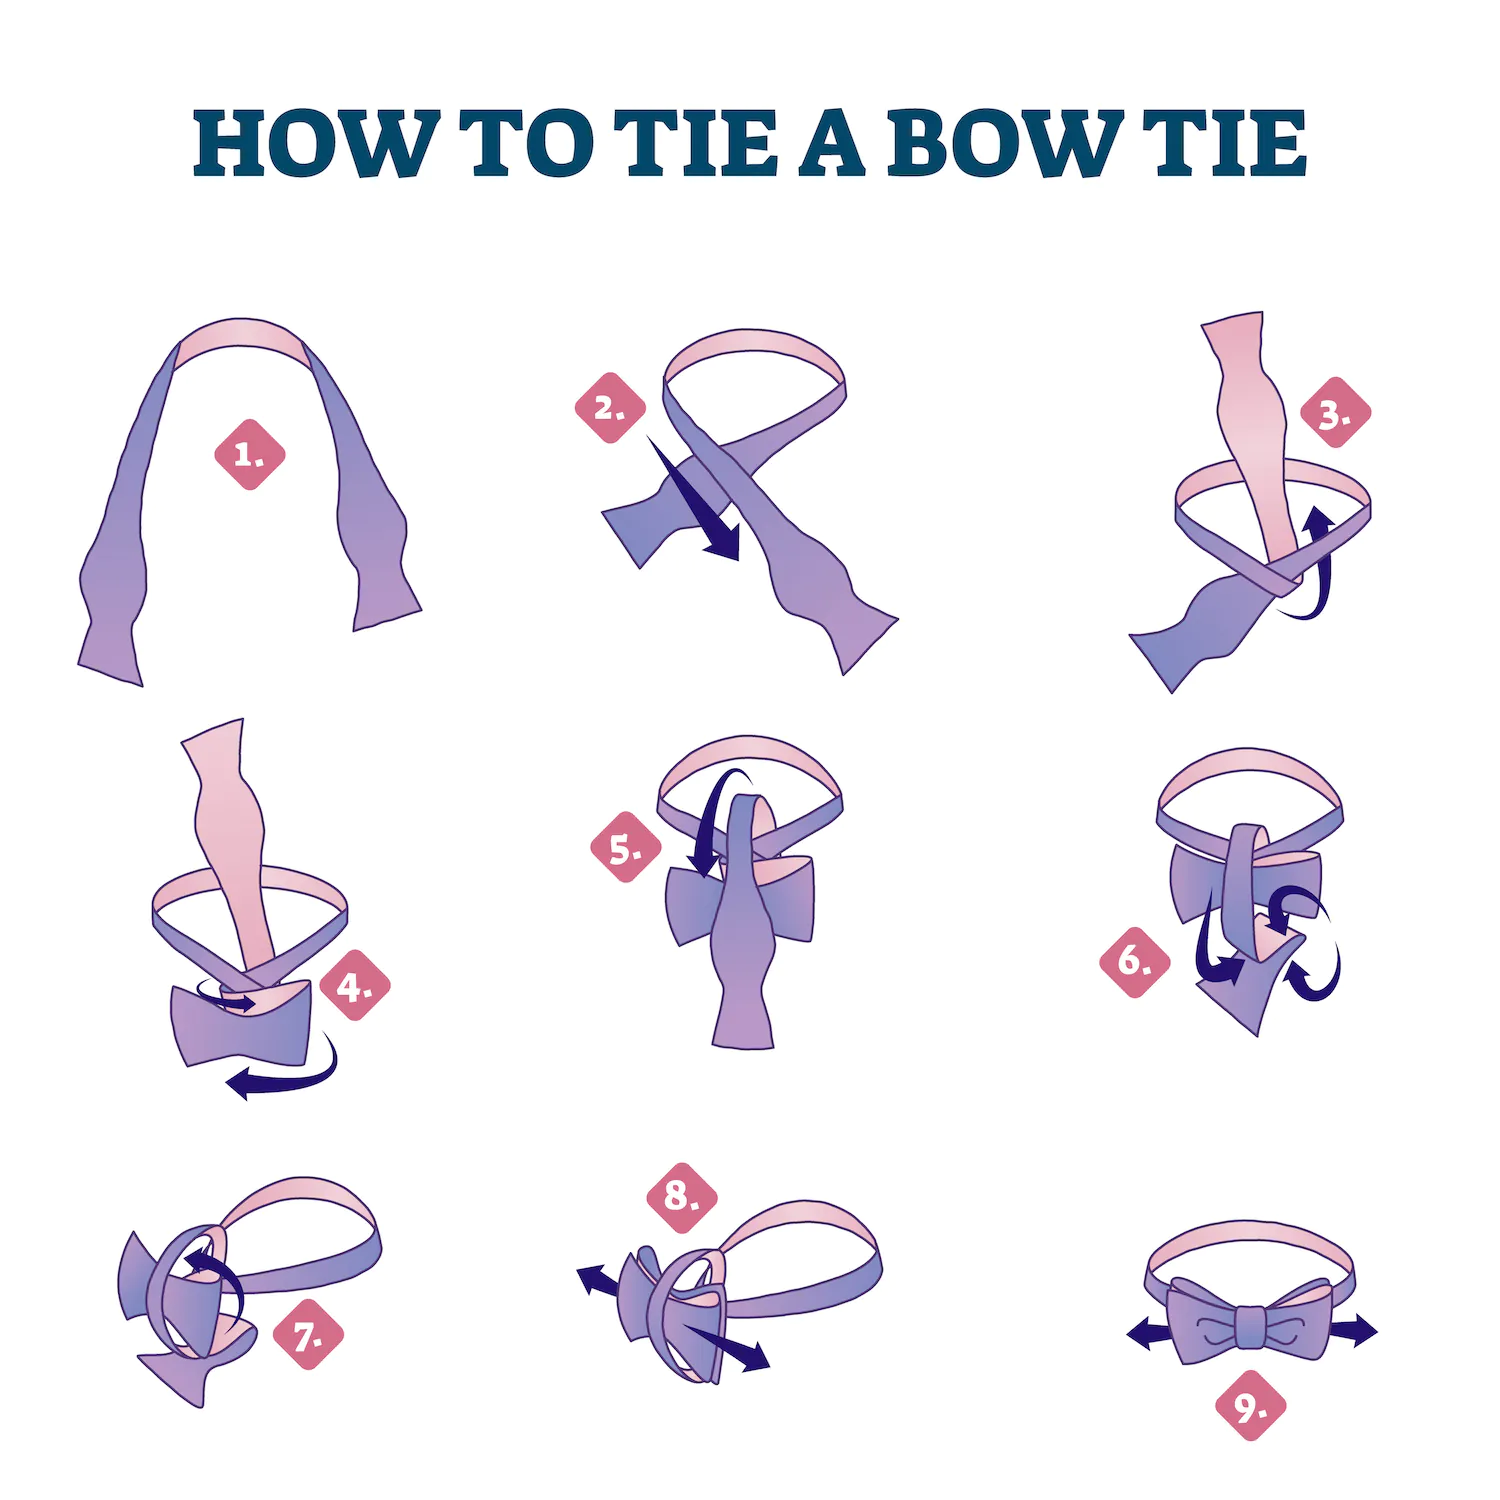
Exuding a charm that is both vintage and contemporary, the bow tie has been a mainstay in men's formal wear for centuries. Whether you're attending a gala, a black-tie event, or simply want to add a touch of classic panache to your men's suit online, a perfectly tied bow tie is indispensable. Ditching the pre-tied versions and mastering the art of tying one yourself is a skill every gentleman should possess. Not only does it elevate your style game, but it also speaks volumes about your attention to detail.
While tying a bow tie may seem intricate at first, with practice, it becomes a swift and easy process. A self-tied bow tie offers a unique charm that pre-tied versions simply can't replicate. Step out in confidence, knowing that your bow tie is a testament to your sartorial expertise.
Tying a tie, be it the classic Four-in-Hand Knot, the elegant Half-Windsor or Windsor Knot, or the timeless bow tie, is a quintessential skill for every modern gentleman. Each method lends its unique flair to your ensemble, ensuring you're impeccably dressed for every occasion. By mastering these tying techniques, you not only elevate your men's suit online ensemble but also embrace a tradition that has been celebrated for centuries. So, the next time you stand in front of the mirror, tie in hand, remember the steps, be patient, and take pride in perfecting the knots that define classic men's fashion.
With the top rated event creator, wedding event creator for groups! Best for wedding, prom and special events! Suit up yourself and your groomsman!
With just few easy step you can create an event, invite the members and get professional help!
How It Works Create Event Now!Viktoria, a gifted author, embarked on a captivating journey when her husband's wedding suit led her to SuitCentury. As she stood amidst the refined elegance of the shop, inspiration struck like a lightning bolt. Viktoria's pen became an extension of the exquisite fabrics and masterful tailoring. Her words danced with the grace of a well-fitted suit, capturing the essence of SuitCentury's timeless allure. Now, her stories intertwine with threads of elegance, enchanting readers with narratives that celebrate the artistry of fashion. Viktoria, the author who found her voice in the embrace of SuitCentury.